Cheesy baked chicken breast and peppers is the kind of dinner that stops the scroll. If you have been searching for a meal that combines the succulence of perfectly roasted poultry with the indulgent pull of melted mozzarella, you have arrived. This recipe isn’t just a meal; it is a visual masterpiece featuring blistered peppers and golden-brown parmesan that validates every Pinterest craving.
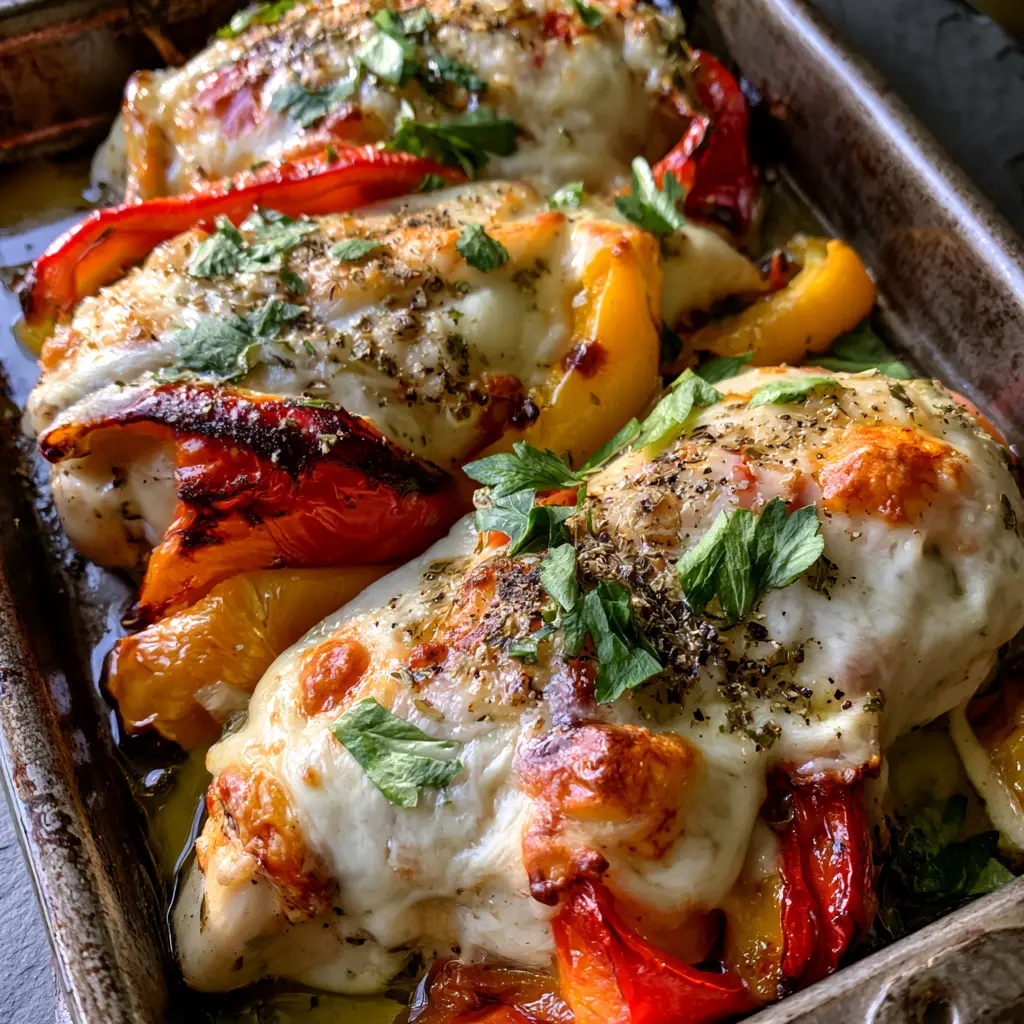
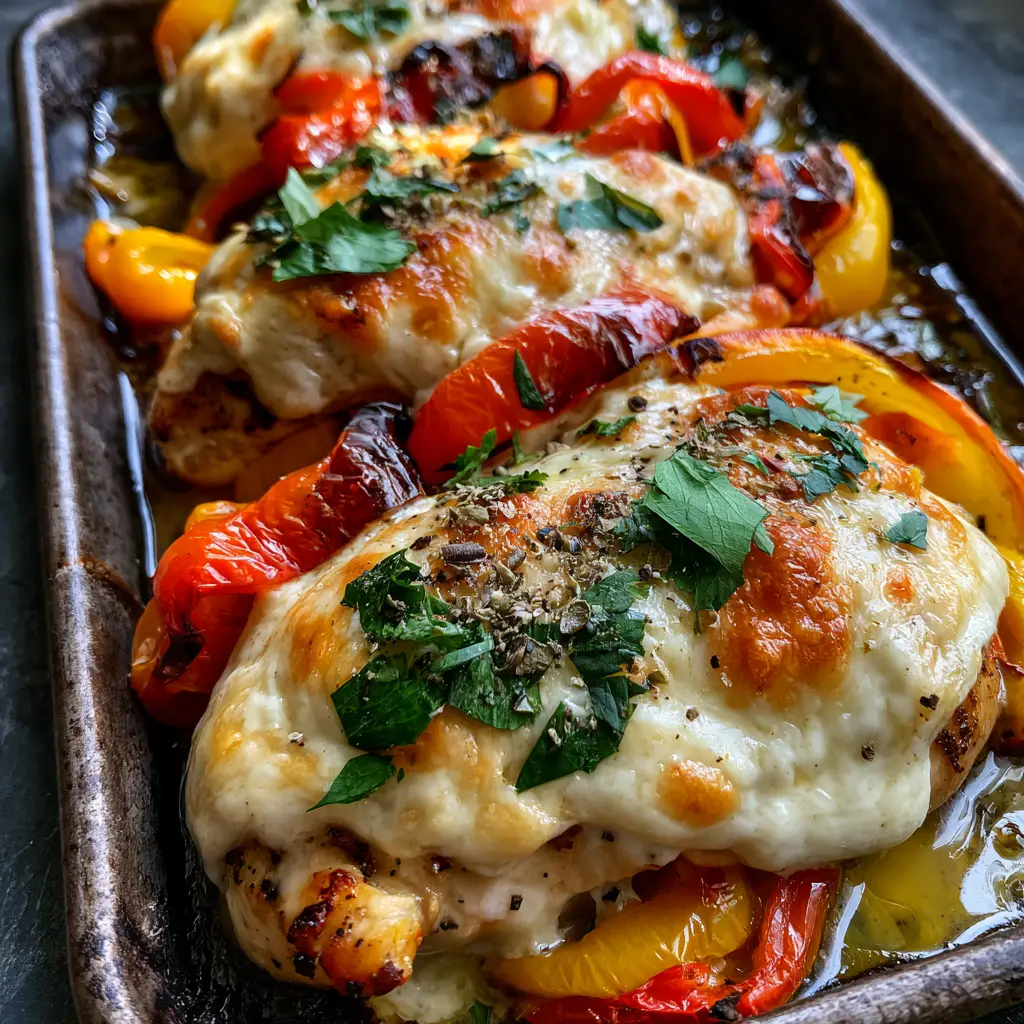
Imagine pulling a rustic, dark metal sheet pan out of the oven. The first thing you notice is the cheesy baked chicken breast and peppers glistening under the kitchen lights. The chicken is completely buried under a bubbly, uneven layer of mozzarella and toasted parmesan. Tucked around the meat are thick strips of red and yellow bell peppers, their edges charred and textures soft. It is a symphony of colors and textures that tastes even better than it looks.
Why This Cheesy Baked Chicken Recipe Dominates Your Dinner Rotation
- Visual Texture: The contrast between the blistered red bell pepper strips and the golden-brown toasted parmesan creates a professional restaurant-style presentation.
- Succulent Results: By roasting the chicken with olive oil and bell pepper juices, we ensure the meat remains moist and tender, never dry.
- One-Pan Simplicity: This dish delivers high-impact flavor with minimal cleanup, making it the perfect follow-up to our perfect oven-baked chicken breast tutorial.
- Aromatic Perfection: The combination of dried oregano, fresh parsley, and coarse cracked black pepper fills your home with an irresistible Mediterranean scent.
The Essential Ingredients for Cheesy Baked Chicken Breast and Peppers
To achieve the specific look and flavor profile of this cheesy baked chicken breast and peppers, you need ingredients that offer both structural integrity and high-fat content for that perfect cheese melt.
Thick Chicken Breasts: Look for 8oz (225g) portions. Thick breasts withstand the high heat required to blister the peppers without overcooking the center of the meat.
Vibrant Bell Peppers: We use both red and yellow peppers. Red peppers provide a deep sweetness when charred, while yellow peppers offer a bright, acidic counterpoint. Both must be sliced into thick strips to maintain their shape.
The Dual-Cheese Layer: Mozzarella provides the “pull” and moisture, while Parmesan provides the “toast” and salty punch. Using both is the secret to that bubbly, toasted crust shown in the photos.
Extra Virgin Olive Oil: This is the vehicle for heat. It helps the chicken sear and allows the peppers to reach that “wilted” and “blistered” state in the high-heat environment of the oven.
Herbs and Seasoning: Coarse cracked black pepper and dried oregano provide the earthy baseline, while a heavy garnish of fresh chopped parsley adds the necessary “green” pop to the final dish.
Step-by-Step Instructions: Mastering the Roast
1. Prepare the Sheet Pan and Oven
Preheat your oven to 400°F (200°C). For the best results, use a dark metal sheet pan. Dark metal absorbs more heat, which is crucial for achieving those charred yellow bell pepper strips. If you use a light-colored pan, your peppers may steam rather than blister.
2. Seasoning for Maximum Surface Area
Pat your chicken breasts dry with a paper towel. This is a non-negotiable step. If the surface is wet, the cheese won’t adhere, and the meat won’t brown. Rub the chicken with olive oil, then season generously with salt, coarse cracked black pepper, and dried oregano. If you enjoy Mediterranean flavors, you might also like our classic greek chicken and vegetables.
3. The Pepper Arrangement
Slice your red and yellow bell peppers into thick 1-inch (2.5cm) strips. Toss them in a bowl with olive oil and a pinch of salt. Arrange the chicken breasts in the center of the pan and tuck the pepper strips tightly around them. This “huddling” technique allows the juices from the chicken to mingle with the peppers, creating a rich sauce on the pan floor.
4. The Initial Roast
Slide the pan into the oven. Roast for 15-18 minutes. At this stage, the chicken should be nearly cooked through, and the peppers should begin to show visible blistered charred edges. You want to see the peppers softening and “wilting” into the pooling olive oil and chicken juices.
5. The Bubbly Cheese Transformation
Remove the pan briefly. Switch your oven to the Broil setting. Pile a thick, uneven layer of shredded mozzarella over each chicken breast. Follow this with a generous dusting of grated parmesan. The unevenness is key—it creates the “peaks” that turn golden-brown while the “valleys” stay white and stretchy.
6. The Final Char
Place the pan back under the broiler for 2-4 minutes. Watch it like a hawk! You are looking for the mozzarella to become bubbly and melted and the parmesan to turn a deep, toasted gold. The peppers will pick up even more char during this stage, completing the rustic look.
Expert Tips for Success with Cheesy Chicken
- The Resting Period: Let the chicken rest on the pan for 5 minutes before serving. This allows the glistening juices and olive oil to be reabsorbed into the meat, ensuring every bite is succulent.
- Fresh vs. Dried Parsley: Always use fresh parsley for the final garnish. Dried parsley lacks the vibrant green color and the fresh hit of chlorophyll that cuts through the richness of the cheese.
- Check the Internal Temp: Use a meat thermometer to ensure the chicken reaches 165°F (74°C). For more tips on timing, check our guide on how to bake chicken breasts perfectly every time.
- Don’t Over-Crowd: If the peppers are piled on top of each other, they will steam. Ensure they are in a single layer touching the metal of the pan for the best blisters.
The Science of the Perfect Cheese Crust
Why do we use two types of cheese for our cheesy baked chicken breast and peppers? It comes down to the Maillard reaction. Mozzarella has a high moisture content and a low melting point, making it ideal for that gooey base. Parmesan, however, has a lower moisture content and higher protein/fat density. It browns much faster and more intensely, providing the “crunch” and toasted flavor that makes this dish viral-worthy on Pinterest.
When these two cheeses interact under the broiler, the mozzarella protects the chicken from drying out, while the parmesan creates a savory “lid” that traps steam. This is a similar technique used in our baked chicken with feta recipe, though the results here are much more indulgent and stretchy.
How to Store, Reheat, and Freeze
To Store: Place leftovers in an airtight container for up to 3 days. The peppers will continue to soften, becoming even more flavorful as they marinate in the residual olive oil.
To Reheat: Avoid the microwave if possible, as it can make the chicken rubbery. Instead, place the chicken and peppers back on a sheet pan and heat in a 350°F (175°C) oven until the cheese is bubbly again.
To Freeze: While you can freeze this dish, the texture of the bell peppers will change significantly upon thawing (they will become much softer). It is best enjoyed fresh or from the fridge.
What to Serve with Cheesy Baked Chicken and Peppers
This dish is naturally low-carb and keto-friendly, but if you want a more substantial meal, consider these pairings:
- Orzo or Rice: Serve over a bed of lemon-butter orzo. If you like the chicken-pasta combo, try our cheesy chicken and broccoli orzo.
- Crusty Bread: You will want a piece of toasted baguette to sop up the glistening juices and olive oil pooled in the corners of the pan.
- Light Salad: A simple arugula salad with lemon vinaigrette provides a peppery bite that balances the rich mozzarella.
- Mediterranean Sides: Since we use oregano and parsley, this fits perfectly alongside our salsa fresca baked chicken as part of a larger family feast.
Frequently Asked Questions
Absolutely. Chicken thighs are even more forgiving and will stay juicy. However, they may require an additional 5-7 minutes of initial roasting time before you add the cheese topping.
It is not recommended. Frozen peppers contain excess moisture that will cause the chicken to steam rather than roast, preventing the peppers from getting those iconic blistered, charred edges.
The key is the mozzarella layer. By adding a thick layer of mozzarella, you create a moisture barrier that protects the chicken meat from the direct heat of the broiler, keeping it succulent while the parmesan toasts on top.
Yes! This cheesy baked chicken breast and peppers is naturally low-carb and high-protein, making it an excellent choice for keto or gluten-free diets.
You can use a glass baking dish or a light aluminum pan, but you may need to broil the peppers for an extra 2-3 minutes at the end to achieve the visible charring seen in the recipe photos.
The Official Cheesy Baked Chicken Breast and Peppers Recipe
Get ready to create the most saved recipe on your Pinterest board. Follow these steps exactly to achieve the rustic, charred, and cheesy results seen in the photos.

Cheesy Baked Chicken Breast and Peppers: The Ultimate Sheet Pan Meal
Ingredients
Equipment
Method
- Preheat oven to 400°F (200°C). Pat chicken breasts dry and season with olive oil, salt, cracked black pepper, and dried oregano.
- Place chicken on a dark metal sheet pan. Surround with thick strips of red and yellow bell peppers tossed in olive oil.
- Bake for 15-18 minutes until chicken is almost cooked and peppers are starting to blister at the edges.
- Switch oven to Broil. Top chicken with a thick layer of mozzarella and a dusting of parmesan.
- Broil for 2-4 minutes until cheese is bubbly and toasted golden brown.
- Remove from oven, sprinkle heavily with fresh parsley, and let rest for 5 minutes before serving.
Notes
Ensure chicken reaches internal 165°F.
Save This Recipe to Pinterest!
If you loved this cheesy baked chicken breast and peppers, don’t let it get lost in the feed! Hover over any image to Pin it to your Dinner Inspiration board.
Follow sunlit_table for more high-flavor, visual recipes that make home cooking look like a professional photo shoot. If you make this, snap a photo and share it in the comments below—we love seeing your blistered peppers and bubbly cheese! Don’t forget to leave a 5-star rating to help other home cooks find this delicious meal.