There is a specific, visceral joy in biting into perfectly constructed chicken ranch wraps that most home cooks struggle to replicate at home. We have all been there: a soggy tortilla, flavorless chicken, or a dressing that disappears into the background.
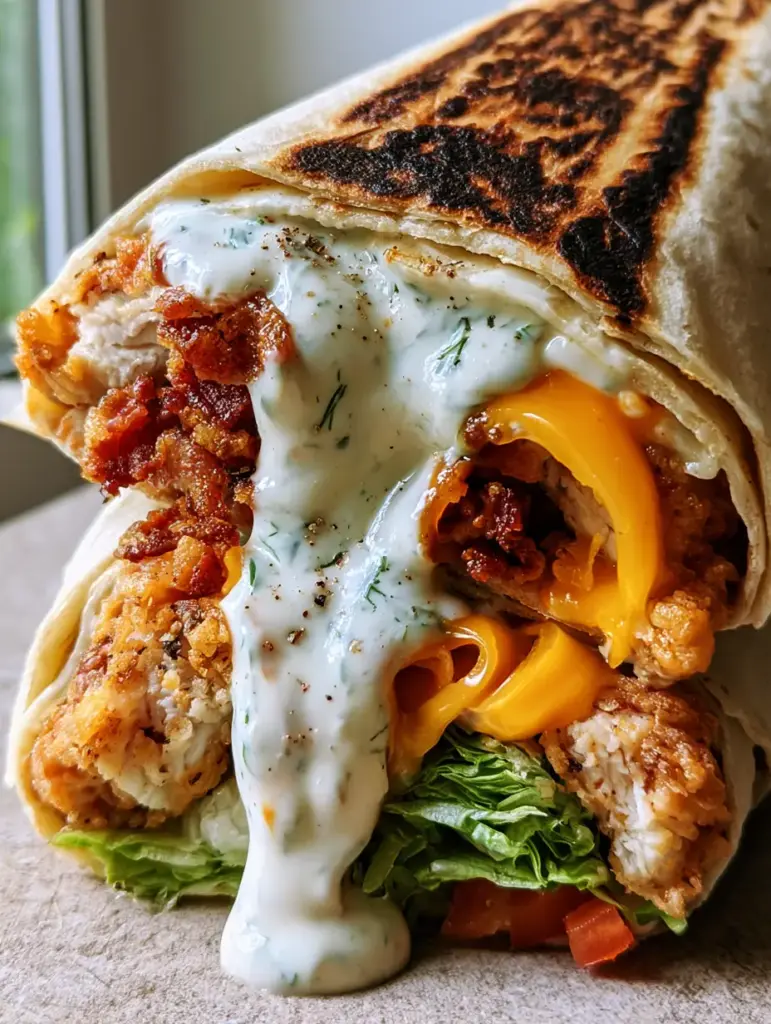
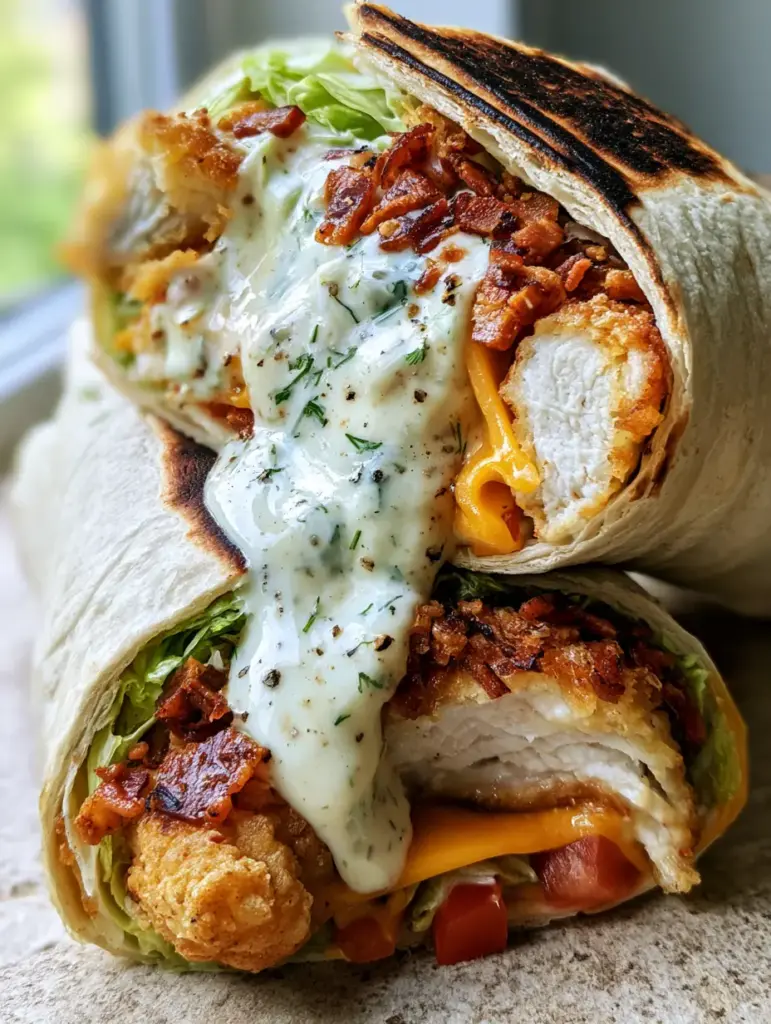
Today, we are moving past the mediocre. We are crafting a handheld masterpiece that features deep golden-brown toasted exteriors, dark sear marks along the seal, and a cross-section that reveals thick, melted ribbons of sharp orange cheddar cheese.
This recipe is designed to bridge the gap between high-end bistro quality and the comfort of your own kitchen. By following our forensic culinary approach, you will achieve that exact smartphone-photo-worthy finish every single time.
Why These Crispy Handhelds Outperform Every Other Recipe
- The Forensic Crunch: We use a double-dredge method on the chicken breast strips to ensure they stay crunchy even when enveloped in thick ranch dressing.
- Textural Contrast: The combination of shattered bits of crispy smoked bacon and vibrant emerald-green shredded romaine lettuce provides a multi-dimensional mouthfeel.
- The Perfect Sear: Our technique for toasting the flour tortilla creates a structural integrity that prevents the wrap from falling apart while adding a nutty, toasted flavor.
- Herb-Forward Dressing: A heavy drizzle of thick, glossy white buttermilk ranch with visible specks of fresh green dill elevates the flavor profile beyond standard bottled options.
The Essential Elements for Restaurant-Quality Wraps
Achieving the visual and flavor profile described in our blueprint requires specific high-quality components. Do not compromise on the sharpness of the cheese or the freshness of the herbs.
The Protein and Dairy Foundation
Chicken Breast Tenders: 1.5 lbs (680g) of fresh chicken breast, sliced into uniform strips. Uniformity ensures that every bite has the same ratio of meat to breading.
Sharp Orange Cheddar: 1.5 cups (170g) of freshly grated sharp cheddar. Pre-shredded cheese is coated in potato starch, which prevents the “thick melted ribbons” we are looking for; always grate your own.
Smoked Bacon: 8 thick-cut slices (approx. 225g) of hardwood-smoked bacon. We need the structural integrity of thick-cut slices so they can be “shattered” into distinct, crunchy bits.
The Fresh Produce and Tortilla Base
Large Flour Tortillas: 4-6 extra-large (10-inch or 25cm) flour tortillas. Look for tortillas with a high moisture content to avoid cracking during the folding process.
Green Romaine Lettuce: 2 cups (150g) of shredded emerald-green romaine. Romaine provides the necessary “snap” that softer lettuces like iceberg or butter lettuce lack.
Roma Tomatoes: 3 medium (180g) vine-ripened Roma tomatoes. These are preferred for wraps because they have a lower water content than beefsteak varieties, preventing sogginess.
The Signature Ranch and Seasonings
Thick Buttermilk Ranch: 1/2 cup (120ml) of high-quality buttermilk ranch dressing. If you aren’t making it from scratch, ensure it is a refrigerated variety for better viscosity.
Fresh Green Dill: 2 tbsp (8g) of finely chopped fresh dill. This adds the visible green specks and bright herbal notes required for the authentic look and taste.
Cracked Black Pepper: 1 tsp (2g) of coarsely cracked black pepper flakes. The coarse grind is essential for the visual “oozing” contrast against the white dressing.
Foundational Tools for the Perfect Sear
To achieve the dark brown sear marks specifically along the folded seal, you need a heavy-bottomed pan. A cast-iron skillet or a stainless steel sauté pan is ideal for heat retention.
You will also need a sharp chef’s knife to achieve the clean diagonal stack shown in our visual blueprint. A dull blade will squash the wrap and squeeze out the ranch dressing.
Step-by-Step Construction for Maximum Crunch
Step 1: The Double-Dredge Chicken Prep
Season your chicken strips with kosher salt and black pepper. Dip each strip into a bowl of whisked eggs, then into a mixture of seasoned flour and panko breadcrumbs.
Press the breading firmly into the meat. Fry in 1/2 inch (1.25cm) of neutral oil at 350°F (175°C) until the exterior is a deep, crunchy golden-brown.
Step 2: Shattering the Smoked Bacon
Cook the bacon until it is beyond chewy and into the “crispy” territory. Allow it to cool on a wire rack to maintain airflow, which prevents the fat from softening the protein.
Once cooled, roughly chop the bacon into “shattered bits.” This creates small pockets of intense smoky flavor throughout the chicken ranch wraps.
Step 3: The Assembly Logic
Lay your flour tortilla flat. Place a layer of the melted sharp cheddar ribbons directly onto the warm chicken tenders to initiate the melt.
Top with the shredded romaine, diced Roma tomatoes, and the shattered bacon. Drizzle the herb-flecked ranch generously over the center, followed by a final sprinkle of cracked black pepper flakes.
Step 4: Executing the Forensic Sear
Fold the sides of the tortilla in, then roll tightly. Place the wrap, seam-side down, in a dry, pre-heated skillet over medium-high heat.
Apply light pressure with a spatula. This creates the specific dark brown sear marks along the seal, effectively “welding” the wrap closed while toasting the exterior to a perfect golden-brown.
Expert Tips for Handheld Success
- Control the Moisture: Pat your diced Roma tomatoes dry with a paper towel before adding them to the wrap to prevent the ranch from thinning out.
- The Temperature Gradient: Ensure your chicken and bacon are hot when you add the cheese; this creates the “oozing” ribbon effect without needing to microwave the entire wrap.
- Tortilla Pliability: Briefly microwave the tortillas for 10 seconds under a damp paper towel before rolling. This prevents the flour skin from tearing.
- The Diagonal Cut: Use a serrated knife or a very sharp chef’s knife in one swift motion to achieve the professional cross-section stack.
Optimal Storage and Reheating Protocols
Chicken ranch wraps are best enjoyed immediately to appreciate the contrast between the hot chicken and cold lettuce. However, you can store components separately for up to 3 days.
To reheat, avoid the microwave as it will turn the tortilla rubbery. Instead, place the wrap in an air fryer at 350°F (175°C) for 3-5 minutes to restore the exterior crunch.
What to Serve with Your Crispy Wraps
Pairing these wraps with the right sides can turn a simple lunch into a full culinary experience. If you are a fan of the flavor profile, you might also enjoy our creamy bacon ranch pasta salad for a double dose of herb-flecked goodness.
For those looking for a lighter dinner option, these wraps pair beautifully with perfectly seasoned grilled chicken skewers or a side of creamy avocado salad. If you prefer a warm side, consider a small portion of bacon ranch pasta skillet to round out the meal.
Frequently Asked Questions
Yes, you can substitute grilled chicken for a lighter version. However, the ‘crunch’ factor described in the visual blueprint relies on the breaded texture of fried tenders.
Use a medium-high heat on a dry cast-iron skillet. Press down firmly with a spatula for 30-45 seconds only on the seal side first, then rotate for a lighter golden toast on the remaining sides.
First, pat your diced tomatoes dry with a paper towel. Second, place the lettuce between the tortilla and the wet ingredients to act as a moisture barrier.
Fold the left and right sides in about 2 inches, then roll from the bottom up while tucking the filling. Immediately place it seam-side down in a hot pan to ‘sear’ it shut.
Roma tomatoes have a thicker fruit wall and fewer seeds/juice compared to other varieties, which helps maintain the structural integrity of the wrap and prevents sogginess.
The Ultimate Crispy Chicken Ranch Wrap Recipe
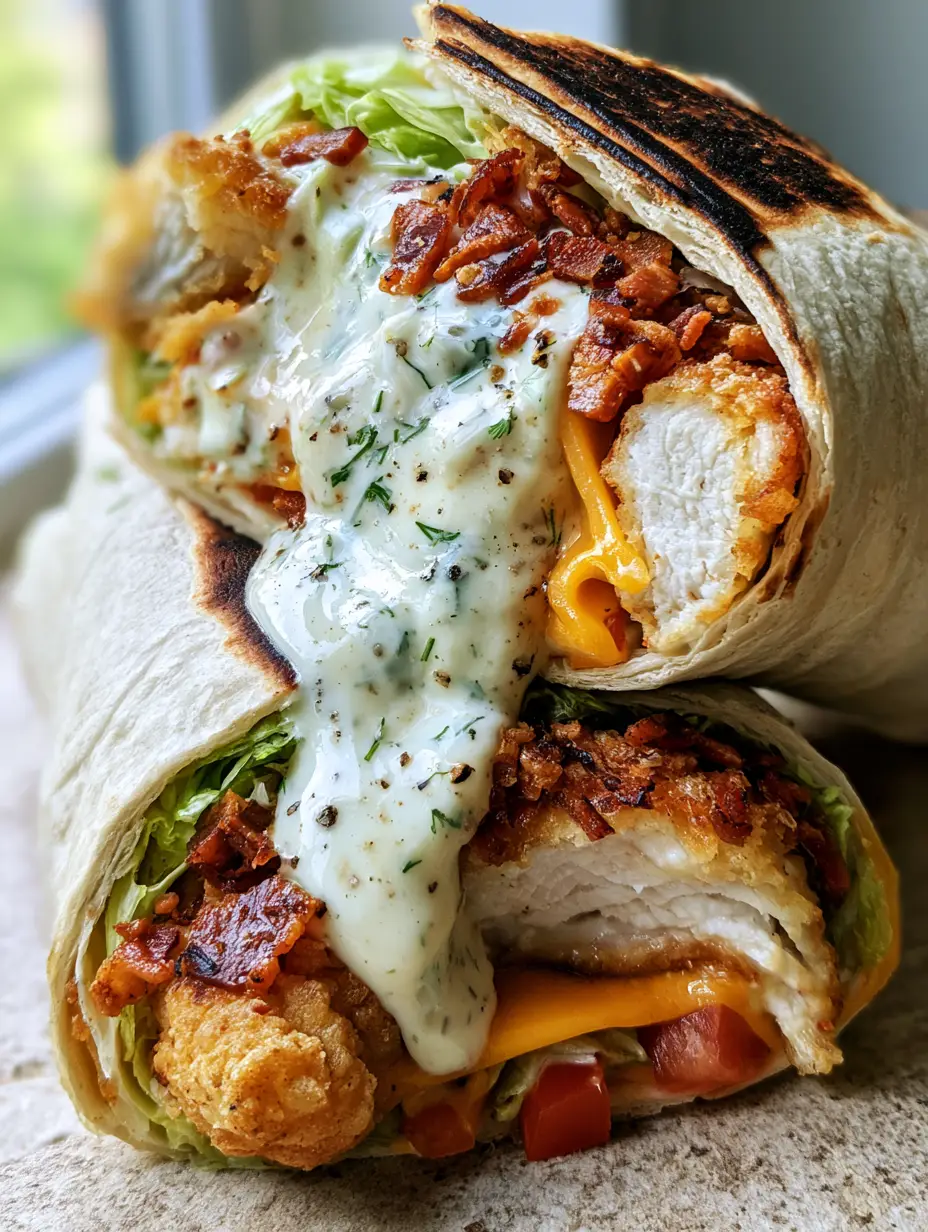
Chicken Ranch Wraps with Crispy Bacon and Sharp Cheddar
Ingredients
Equipment
Method
- Dredge chicken in flour, egg, and panko. Fry in neutral oil until deep golden-brown and crispy.
- Cook bacon until shattered texture is achieved, then roughly chop into bits.
- Lay tortilla flat. Layer chicken, cheddar, bacon, lettuce, and tomatoes. Drizzle with ranch, dill, and pepper.
- Fold tightly. Place seam-side down in a hot skillet. Sear until dark brown marks appear on the seal and the exterior is toasted.
Notes
Pat the tomatoes dry to prevent a soggy wrap.
Share Your Culinary Success!
We want to see your perfect sear marks and oozing ranch centers! If you made these chicken ranch wraps, leave a comment below and tell us how the double-dredge method worked for you.
Don’t forget to save this recipe to your “Easy Lunches” board on Pinterest and follow us for more forensic recipe breakdowns. Happy cooking!