This Ginger Garlic Chicken Thigh Bake is the ultimate intersection of high-end culinary technique and weeknight simplicity. If you have been searching for a recipe that delivers crispy caramelized chicken skin and a thick amber ginger garlic glaze that rivals your favorite bistro, you are in the right place. This dish isn’t just a meal; it’s a visual masterpiece designed to stop the scroll on Pinterest and satisfy the deepest umami cravings of your family.
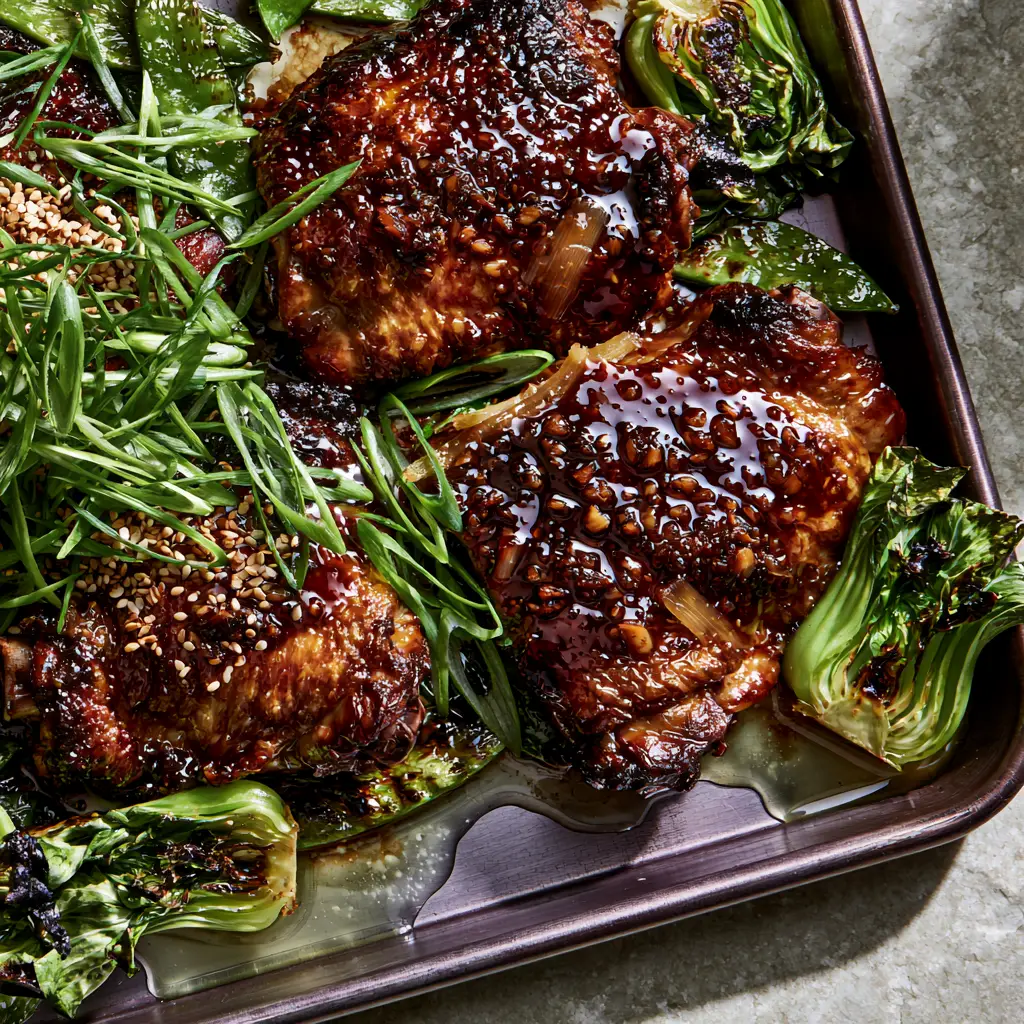
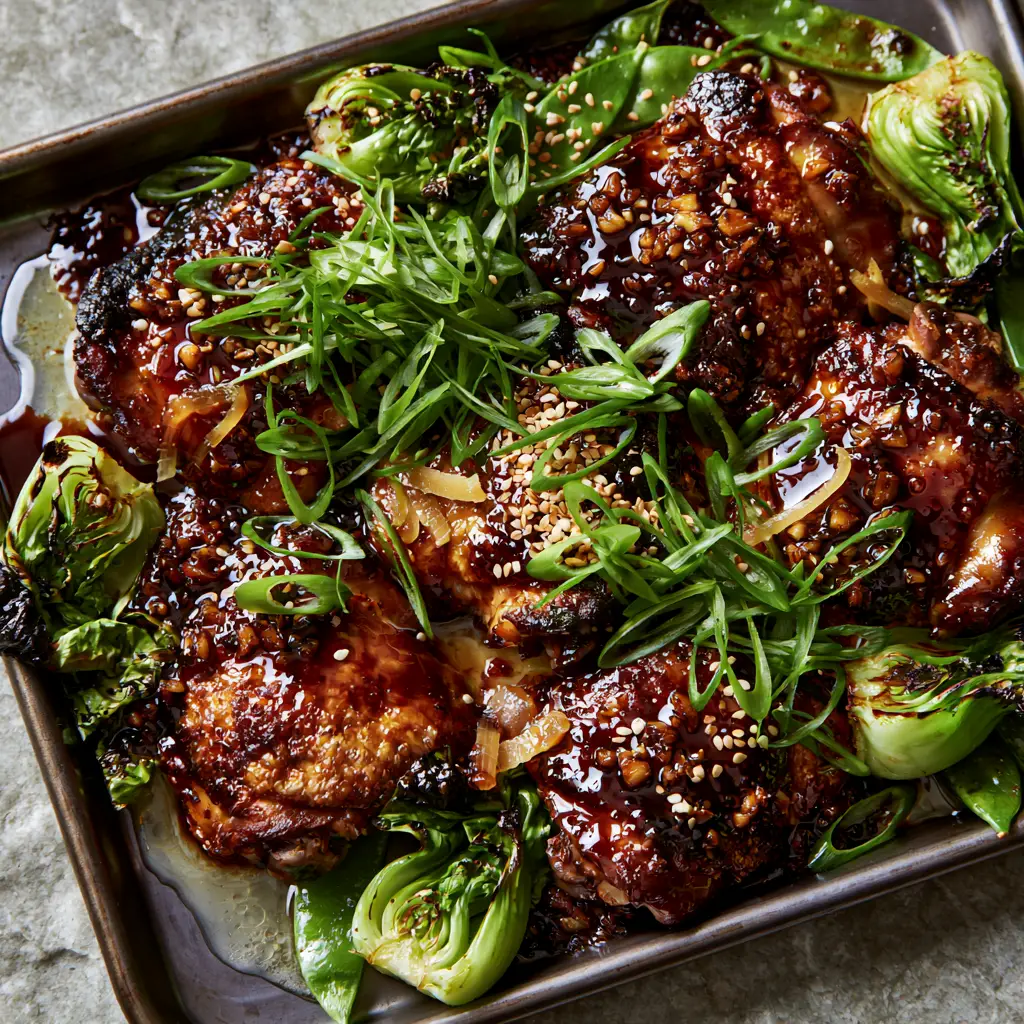
The beauty of the Ginger Garlic Chicken Thigh Bake lies in the sheet pan method. By roasting everything together, the savory pan juices from the chicken mingle with the translucent ginger matchsticks and toasted minced garlic, creating a built-in sauce that coats the blistered snap peas and charred baby bok choy. It is a complete, vibrant dinner that requires minimal cleanup but offers maximum flavor density.
Why This Sheet Pan Ginger Garlic Chicken Works
- Textural Contrast: We achieve a shatteringly crispy golden-brown skin while keeping the meat underneath succulent and tender.
- Viscous Glaze: The combination of honey and soy reduces in the oven into a reflective, dark amber glaze that clings to every bite.
- One-Pan Efficiency: From the blistered snap peas to the charred baby bok choy halves, your protein and greens cook in harmony.
- Aromatic Depth: Using both toasted minced garlic and fresh ginger slivers ensures layers of flavor in every forkful.
If you love the flavor profile of this dish, you might also enjoy our Chinese honey garlic chicken or for a different texture, try these creamy garlic chicken thighs.
Essential Ingredients for the Perfect Amber Glaze
To achieve that thick amber ginger garlic glaze seen in the photos, the quality and ratio of your ingredients matter. We aren’t just making a marinade; we are creating a reduction that happens right on the dark metallic sheet pan.
The Protein Foundation
6-8 Bone-in, Skin-on Chicken Thighs: Bone-in thighs are essential for this Ginger Garlic Chicken Thigh Bake. The bone conducts heat for even cooking, while the skin provides the fat necessary to emulsify the glaze. If you prefer leaner cuts, you can adapt this for baked chicken breasts, though cooking times will vary.
The Aromatic Powerhouses
Fresh Ginger (2-inch/5cm piece): We slice half into translucent ginger matchsticks for texture and grate the rest for the sauce. This dual-action approach maximizes the spicy, floral notes of the ginger.
Fresh Garlic (6 cloves): Use 4 cloves minced for the glaze and 2 cloves thinly sliced. These will become toasted minced garlic bits that add a nutty crunch to the finished Ginger Garlic Chicken Thigh Bake.
The Glaze Components
1/2 cup (120ml) Soy Sauce: This provides the salt and the deep pigment for our dark soy-based glaze.
1/3 cup (80ml) Honey: The primary sugar source that ensures deeply caramelized skin and a viscous consistency.
1 tablespoon (15ml) Toasted Sesame Oil: A little goes a long way in adding a toasted, earthy finish to the savory pan juices.
1 tablespoon (15ml) Rice Vinegar: The acidity balances the sweetness of the honey and the richness of the chicken fat.
Step-by-Step Instructions for Culinary Success
Preparing the Chicken for Maximum Crunch
Start by patting your chicken thighs bone-dry with paper towels. Any moisture on the skin will steam rather than crisp. Season generously with kosher salt, keeping in mind the soy sauce will add more salt later. Place the chicken on a dark metallic sheet pan—the dark surface absorbs more heat, helping to create those slightly blackened edges on the vegetables.
Whisking the Signature Ginger-Garlic Sauce
In a medium bowl, combine the soy sauce, honey, rice vinegar, sesame oil, grated ginger, and minced garlic. Whisk until the honey is fully incorporated. This mixture should look thin now, but don’t worry—as the Ginger Garlic Chicken Thigh Bake roasts, the water evaporates, leaving behind a thick, bubbling, dark amber glaze.
The First Roast
Preheat your oven to 400°F (200°C). Arrange the chicken thighs skin-side up. Brush a thin layer of the glaze over the skin. Roast for 20 minutes. This initial blast of heat begins the rendering of the fat, ensuring the skin is well on its way to becoming crispy and golden-brown.
While the chicken roasts, you can prepare the base for a creamy garlic chicken bowl if you want to serve this over rice or grains later.
Adding the Vibrant Greens
Remove the pan from the oven. Toss the snap peas and baby bok choy halves in the remaining glaze and scatter them around the chicken. Ensure the bok choy is cut-side down to achieve those charred edges. Add the translucent ginger matchsticks and sliced garlic across the pan.
The Final Glaze and Char
Spoon the viscous and reflective sauce over the chicken thighs one last time. Return to the oven for another 12-15 minutes. Watch for the bubbling glaze and the blistered snap peas. The internal temperature of the chicken should reach 165°F (74°C).
Expert Tips for the Best Ginger Garlic Chicken Thigh Bake
- Don’t Crowd the Pan: Give the charred baby bok choy space. If the pan is too crowded, the vegetables will release steam, which softens the crispy caramelized chicken skin.
- Side-Light Photography: If you are taking photos for Pinterest like sunlit_table, use natural morning side-light to catch the reflective quality of the amber ginger garlic glaze.
- Use a Meat Thermometer: Bone-in thighs are forgiving, but pulling them at exactly 165°F ensures the most succulent results.
- The Scallion Finish: Always add the thinly sliced bright green scallions and toasted white sesame seeds after cooking to maintain their fresh color and crunch.
Storage, Reheating, and Meal Prep
The Ginger Garlic Chicken Thigh Bake makes for excellent leftovers. Store in an airtight container for up to 4 days. To maintain the crispy caramelized chicken skin, reheat in an air fryer or oven at 350°F (175°C) for 5-8 minutes. Microwave reheating is convenient but will result in softer skin.
You can also shred the leftover chicken to make a creamy garlic chicken wrap for lunch the next day.
What to Serve With This Dish
The savory pan juices and dark soy-based glaze are liquid gold. We recommend serving this over a bed of jasmine rice or rice noodles to soak up every drop. If you want a lower-carb option, a simple cauliflower rice or even more blistered snap peas works beautifully. This recipe pairs excellently with other Asian-inspired sides, such as honey garlic crispy chicken bites for a larger family gathering.
Frequently Asked Questions
Yes, you can substitute chicken breasts. However, since breasts cook faster and lack skin-on fat, reduce the roasting time to avoid drying them out, or follow our guide for baked chicken breasts.
The secret is two-fold: pat the skin bone-dry with paper towels before seasoning and use a dark metallic sheet pan which conducts more heat to the bottom and sides of the meat.
While you can grate all the ginger, the translucent ginger matchsticks provide a fresh, pungent pop of flavor and a professional visual finish to the dish.
If the sauce hasn’t reduced to a viscous amber glaze by the end of cooking, you can pour the pan juices into a small saucepan and simmer for 2-3 minutes until thickened.
The Ultimate Ginger Garlic Chicken Thigh Bake Recipe
Ginger Garlic Chicken Thigh Bake with Charred Bok Choy
Ingredients
Equipment
Method
- Preheat oven to 400°F (200°C). Pat chicken thighs dry and season with salt.
- Whisk soy sauce, honey, rice vinegar, sesame oil, grated ginger, and minced garlic in a bowl.
- Place chicken skin-side up on a dark sheet pan. Brush with glaze. Roast for 20 minutes until skin starts to brown.
- Arrange bok choy, snap peas, and ginger matchsticks around chicken. Spoon remaining glaze over everything.
- Roast for 12-15 minutes until vegetables are charred and chicken reaches 165°F (74°C).
- Top with sliced scallions and toasted sesame seeds. Serve with pan juices.
Notes
Use a dark sheet pan to encourage better caramelization and charring.
Join the Sunlit Table Community!
Did you make this Ginger Garlic Chicken Thigh Bake? We want to see your crispy golden-brown skin and charred bok choy! Save this recipe to your “Easy Weeknight Dinners” board on Pinterest and follow sunlit_table for more high-flavor, high-visual recipes. Don’t forget to leave a 5-star rating below and upload a photo of your sheet pan masterpiece in the comments!