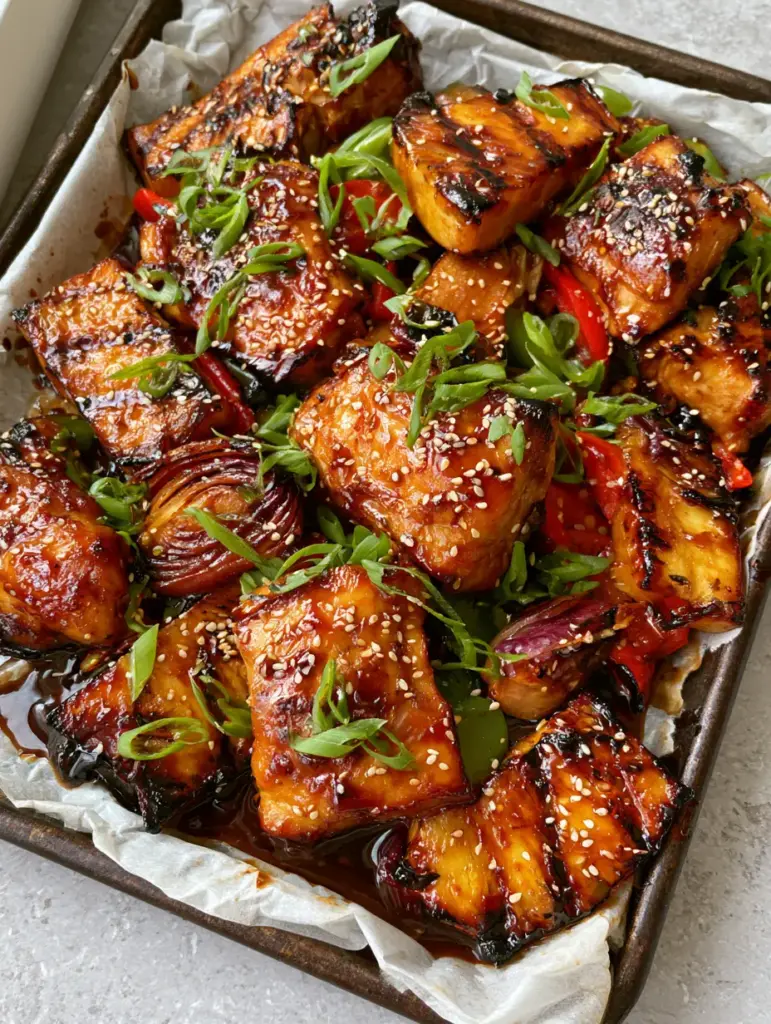
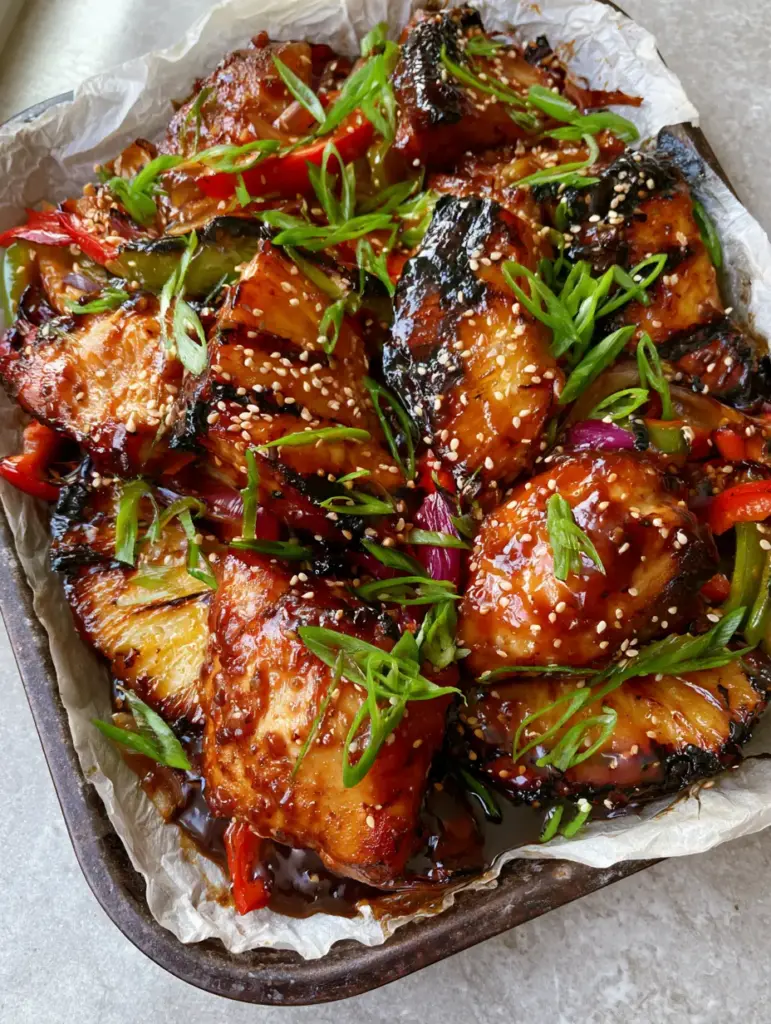
There is a specific visual language to a perfectly executed sheet pan meal. When you look at an unedited, handheld smartphone photo of a rustic dark metal sheet pan lined with wrinkled white parchment paper, your brain immediately registers the textures: the glisten of a thick amber sauce, the sharp contrast of charred fruit, and the vibrant pop of fresh aromatics. This Gluten-free Hawaiian Chicken is designed to be that exact sensory experience, bringing the tropical heat of the islands directly to your kitchen with a sophisticated, allergen-friendly twist.
Imagine succulent chunks of seared chicken breast, each one drenched in a thick, glossy, dark amber teriyaki glaze that pools slightly on the parchment, inviting you to dip a stray vegetable or a piece of crusty bread. Interspersed among the protein are thick wedges of fresh pineapple, sporting distinct dark brown caramelized grill marks and charred edges that promise a balance of sweetness and smoke. This isn’t just a meal; it’s a visual and culinary masterpiece that proves gluten-free cooking never has to compromise on depth of flavor or aesthetic appeal.
Why This Gluten-free Hawaiian Chicken Recipe Works
- The Multi-Textural Glaze: By using a combination of honey and gluten-free tamari, we achieve a high-viscosity, dark amber coating that clings to the chicken rather than running off, ensuring every bite is saturated with flavor.
- High-Heat Charring: We utilize a rustic metal sheet pan and high oven temperatures to create those specific charred red and green bell pepper strips and softened red onion petals seen in professional food photography.
- Balanced Acidity: The fresh pineapple wedges provide a natural enzymatic sweetness that cuts through the savory richness of the seared chicken breast chunks.
- Sensory Garnishing: A heavy dusting of toasted white sesame seeds and a generous pile of thinly sliced bright green scallions provide the final crunch and freshness needed to elevate the dish.
The Anatomy of Ingredients for Visual and Flavor Success
To achieve the result shown in our visual blueprint, every ingredient serves a dual purpose: structural integrity and flavor profile. We aren’t just tossing things on a pan; we are building layers of taste.
The Protein Foundation
1.5 lbs (680g) Chicken Breast: We use boneless, skinless breasts cut into large, succulent chunks. This size is critical; smaller pieces would overcook before the glaze achieves its “pooling” consistency, while larger chunks stay juicy during the searing process.
2 tbsp (30ml) Avocado Oil: Chosen for its high smoke point, this foundational oil allows us to sear the chicken until a deep golden-brown crust forms without the oil breaking down or smoking out the kitchen.
The Tropical Elements
1 Small Fresh Pineapple: You must use fresh pineapple here to get those distinct dark brown caramelized grill marks. Canned pineapple is too soft and contains too much moisture to char properly on the edges.
1 Large Red Bell Pepper and 1 Large Green Bell Pepper: These are sliced into thick strips. The sugars in the peppers react with the high heat to create the charred edges that characterize this rustic presentation.
1 Large Red Onion: Cut into “petals” or thick wedges, the red onion softens into a sweet, translucent texture that nestles perfectly between the chicken chunks.
The Glossy Teriyaki Glaze
1/2 cup (120ml) Gluten-Free Tamari: This provides the deep, dark amber base for our sauce. It is naturally richer and more savory than standard soy sauce, providing the “umami” backbone.
1/3 cup (80ml) Honey or Brown Sugar: The catalyst for the glossy sheen. As the sugars heat, they undergo caramelization, creating that reflective surface seen under natural morning light.
1 tbsp (8g) Fresh Ginger, Grated: Essential for a bright, peppery bite that balances the heavy glaze.
2 tsp (10g) Cornstarch or Arrowroot Powder: The “invisible” thickening agent that ensures the sauce pools slightly rather than remaining a thin liquid.
Essential Equipment for Professional Results
To recreate the specific look of this dish, the equipment is just as important as the ingredients. You will need a rustic dark metal sheet pan. Darker pans absorb more heat, which is the secret to getting those charred edges on the pineapple and peppers.
You must also use white parchment paper. Beyond making cleanup easier, the white background provides a high-contrast surface that makes the dark amber glaze and vibrant green scallions visually “pop.” Finally, a heavy-bottomed cast iron skillet is recommended for the initial sear of the chicken to ensure a crust that holds up under the weight of the sauce.
Step-by-Step Instructions to Achieve the Perfect Char
Phase 1: Preparing the Succulent Chicken Chunks
Start by patting your chicken breast chunks completely dry with paper towels. Moisture is the enemy of a good sear; if the chicken is wet, it will steam rather than brown. Season the chicken liberally with kosher salt and black pepper.
Heat 1 tbsp (15ml) of avocado oil in a large skillet over medium-high heat. When the oil shimmers, add the chicken in a single layer. Sear for 2-3 minutes per side until a deep golden-brown crust forms. The chicken should not be fully cooked through at this stage; we are simply locking in juices and establishing color. Remove and set aside.
Phase 2: Crafting the Glossy Amber Glaze
In a small saucepan, whisk together the gluten-free tamari, honey, grated ginger, and minced garlic. In a separate small bowl, whisk the cornstarch with 1 tbsp (15ml) of cold water to create a slurry. Pour the slurry into the sauce mixture.
Bring the glaze to a gentle simmer over medium heat. Stir constantly for 2-4 minutes. You will watch the sauce transform from a thin brown liquid into a thick, glossy, dark amber teriyaki glaze. It should be thick enough to coat the back of a spoon heavily.
Phase 3: The High-Heat Sheet Pan Assembly
Preheat your oven to 425°F (220°C). Line your dark metal sheet pan with a sheet of wrinkled white parchment paper. The wrinkles aren’t just for aesthetics; they create small pockets for the glaze to pool and caramelize.
Arrange the seared chicken chunks, pineapple wedges, bell pepper strips, and red onion petals across the pan. Pour two-thirds of the glaze over the chicken, using a brush to ensure every piece is drenched. Ensure the pineapple and peppers are touching the pan surface to maximize charring.
Phase 4: The Final Roast and Sensory Cues
Place the pan in the oven and roast for 12-15 minutes. At the 10-minute mark, keep a close eye on the pineapple. You are looking for distinct dark brown caramelized grill marks and edges on the peppers that begin to curl and blacken slightly. The sauce should be bubbling and viscous.
For an extra boost of color, you can turn the broiler on for the final 2 minutes. Watch for the glaze to develop a gentle glisten as the sugars reach their peak temperature. Remove the pan from the oven and allow it to rest for 3 minutes; this allows the sauce to “set” and pool beautifully around the chicken.
Expert Tips for Success
- Don’t Overcrowd the Pan: If the chicken and vegetables are piled on top of each other, they will release steam and you will lose the charred edges. Use two pans if necessary.
- Fresh vs. Frozen: Never use frozen pineapple or peppers for this recipe. The high water content in frozen produce will thin out the glaze, ruining the glossy, thick texture we are aiming for.
- The Starch Secret: If your glaze isn’t thickening enough, remember that cornstarch needs to hit a near-boil to activate its thickening properties. Don’t be afraid of a few bubbles!
- Visual Finishing: Garnish with the scallions and sesame seeds immediately after the pan comes out of the oven so they adhere to the sticky glaze.
Storage, Reheating, and Freezing
This Gluten-free Hawaiian Chicken is best enjoyed fresh when the textures are at their peak. However, leftovers can be stored in an airtight container in the refrigerator for up to 3 days. The glaze will thicken further when cold.
To reheat, avoid the microwave if possible, as it can make the chicken rubbery. Instead, place the chicken and vegetables back on a sheet pan and heat in a 350°F (175°C) oven for 8-10 minutes. This helps restore the slight crispness to the charred edges. We do not recommend freezing this dish, as the peppers and pineapple will become mushy upon thawing.
What to Serve With This
To balance the intense sweetness and saltiness of the teriyaki, serve this dish over a bed of fluffy white jasmine rice or Hawaiian chicken with coconut rice for an extra layer of tropical creaminess. The coconut milk in the rice acts as a perfect foil to the charred peppers.
If you are looking for a lighter option, these chicken chunks work beautifully when served alongside a crisp Vietnamese chicken salad or even a refreshing cold chicken salad to provide a temperature contrast. For those who love the skewer method, you can easily adapt these ingredients into pineapple chicken kabobs for your next outdoor gathering.
Frequently Asked Questions
Yes! Simply replace the gluten-free tamari with an equal amount of coconut aminos. The result will be slightly sweeter and less salty, so you may want to add a pinch of extra sea salt.
Absolutely. Chicken thighs are more forgiving and remain juicy at high heats. Increase the roasting time by 3-5 minutes to ensure the thighs reach an internal temperature of 165°F.
The key is a pre-heated high oven (425°F) and a dark metal sheet pan. Dark metal conducts heat more aggressively, allowing the edges to char quickly while the chicken stays succulent.
Brown sugar or maple syrup will also provide a beautiful glisten, but honey provides the thickest viscosity for that ‘pooling’ effect seen in the recipe photos.
This usually happens if the cornstarch slurry wasn’t brought to a simmer or if too much juice was released from frozen pineapple. Ensure you use fresh fruit and let the sauce bubble to activate the starch.
The Ultimate Gluten-free Hawaiian Chicken Recipe
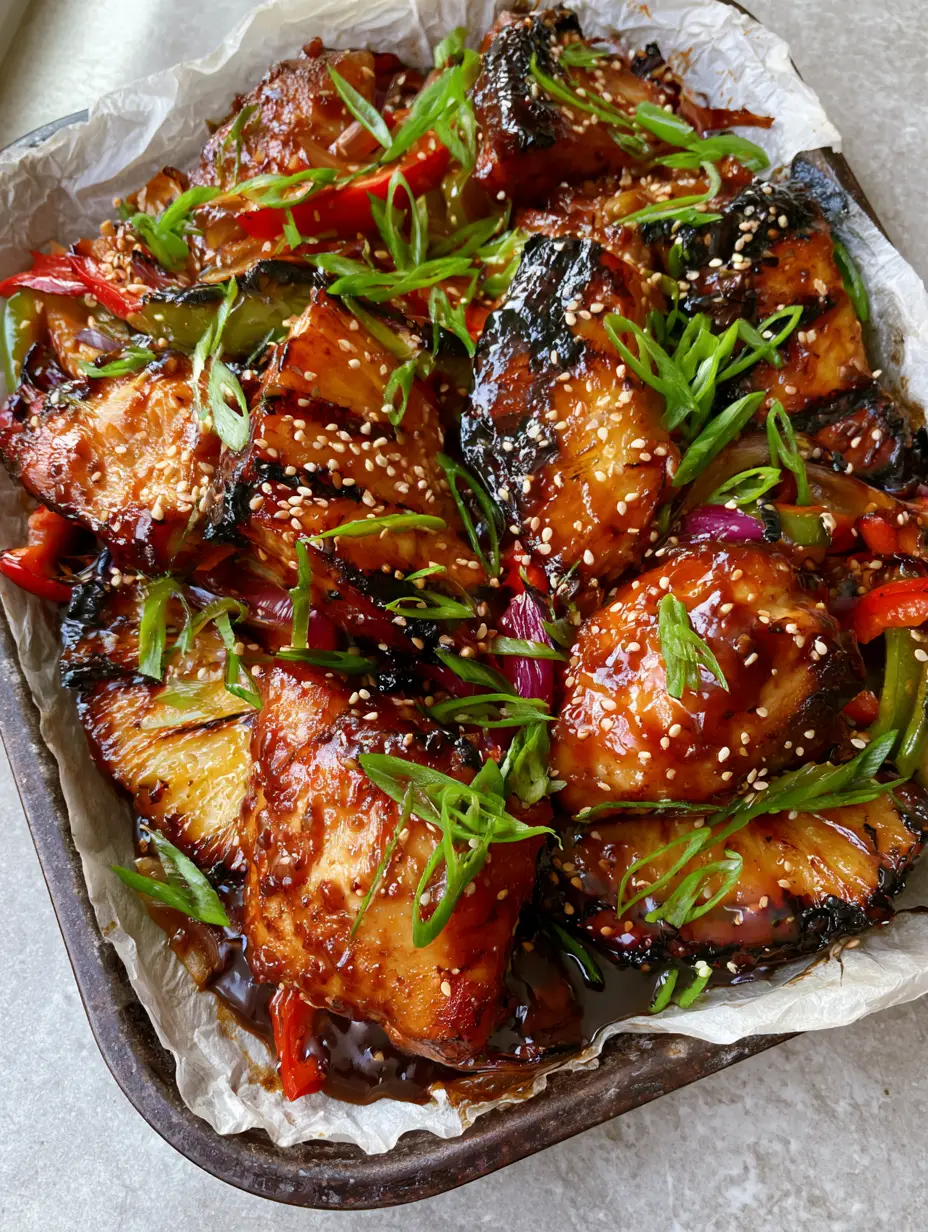
Gluten-free Hawaiian Chicken with Caramelized Pineapple and Glossy Teriyaki Glaze
Ingredients
Equipment
Method
- Pat chicken dry. In a skillet over medium-high heat, sear chicken breast chunks in avocado oil for 2-3 minutes per side until a deep golden-brown crust forms. Set aside.
- Simmer tamari, honey, ginger, and garlic in a saucepan. Whisk in cornstarch slurry and cook until a thick, glossy, dark amber glaze forms.
- Line a dark metal sheet pan with wrinkled parchment. Arrange chicken, pineapple wedges, peppers, and onions. Brush chicken heavily with two-thirds of the glaze.
- Roast at 425°F (220°C) for 12-15 minutes until pineapple shows distinct dark brown caramelized grill marks and peppers are charred. Broil for 2 minutes if needed for extra glisten.
- Remove from oven, drizzle with remaining glaze, and garnish heavily with sliced scallions and toasted white sesame seeds.
Notes
Always use fresh pineapple rather than canned for the best structural results.
Closing & Call to Action
Mastering the Gluten-free Hawaiian Chicken is all about embracing the heat and high-quality ingredients. Whether you are hosting a summer dinner party or looking for a vibrant weeknight meal, this recipe delivers on every sensory promise. The combination of succulent seared chicken and the smoky sweetness of charred pineapple is a timeless pairing that never fails to impress.
If you enjoyed this recipe, please leave a comment below and let us know how your char marks turned out! Don’t forget to sign up for our newsletter for more gluten-free inspirations and share your beautiful sheet pan creations with us on Pinterest.