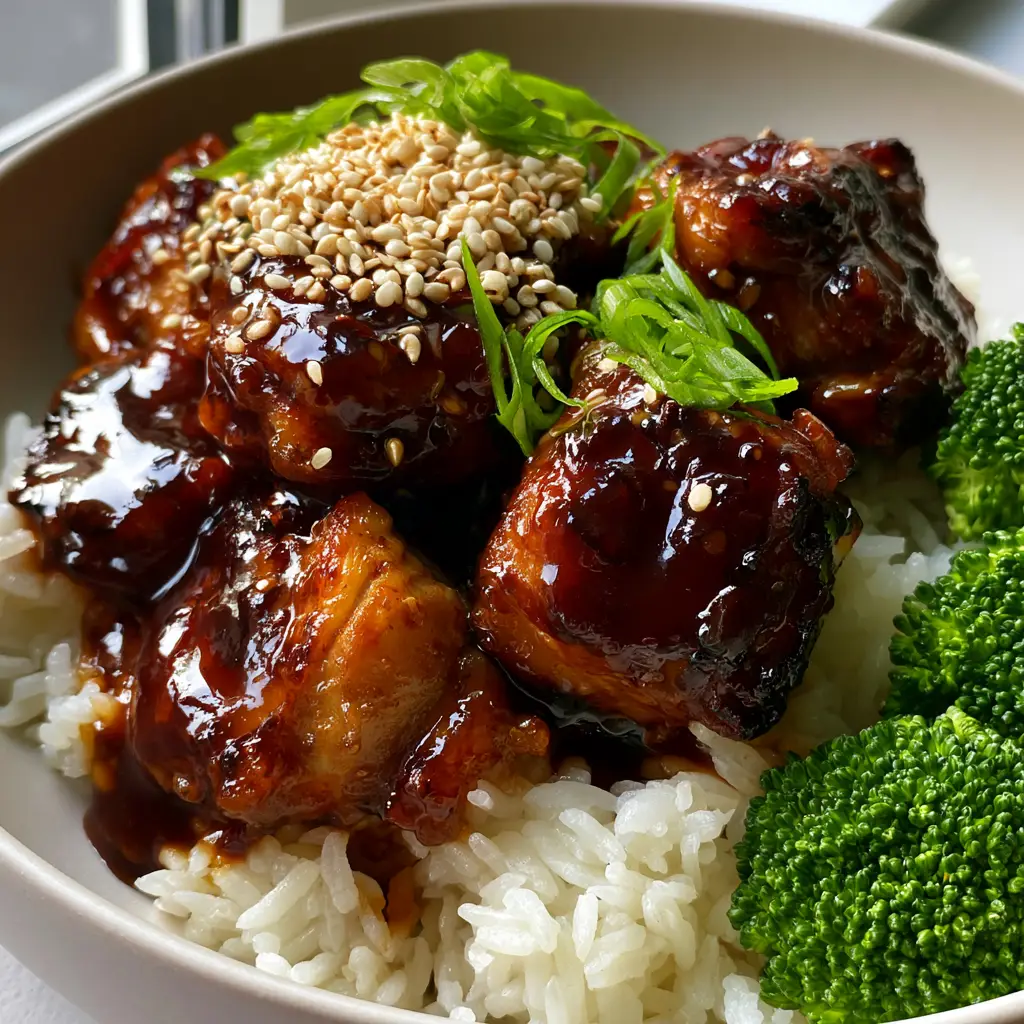
There is a specific, soul-satisfying magic in the perfect Gluten Free Teriyaki Chicken. You know the one—where each bite-sized morsel of chicken thigh is enveloped in a sauce so thick and lustrous it looks like liquid mahogany. It is a dish that balances the intense umami of tamari with the delicate sweetness of mirin, all while maintaining that signature restaurant-style sheen that reflects the light.
Most bottled sauces fail to deliver the high-end aesthetic we crave, often turning watery or overly salty. This recipe transforms humble pantry staples into a culinary masterpiece that rivals the finest teppanyaki grills. By focusing on the science of the sear and the chemistry of a cornstarch-thickened glaze, we achieve a texture that is syrupy, translucent, and undeniably professional.
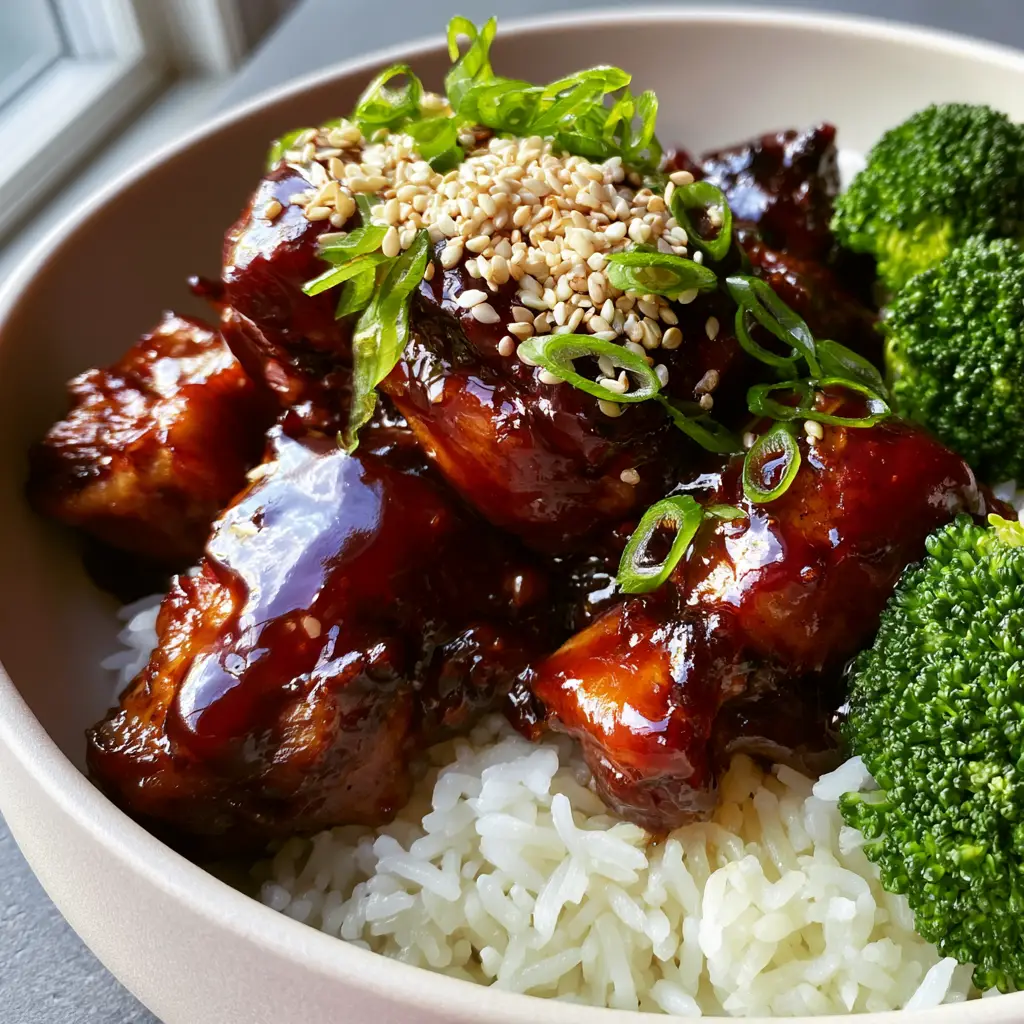
Every element in this bowl serves a purpose. From the emerald green of the steamed broccoli to the paper-thin wisps of fresh scallions, we are building a profile of textures and colors. Whether you are a seasoned home cook or just starting your gluten-free journey, this method ensures a vibrant, delicious result every single time.
Why This Gluten Free Teriyaki Chicken Works
- Ultra-Glossy Texture: The specific ratio of sugars to starches creates a translucent, syrupy consistency that clings to the chicken without becoming gummy.
- Pan-Seared Precision: By using high-heat techniques, we develop slightly crisped, golden-brown edges that provide a structural contrast to the succulent meat.
- Deep Mahogany Hue: The combination of aged tamari and caramelizing brown sugar produces that iconic dark, rich color seen in authentic Japanese-style cooking.
- Forensic Freshness: The addition of vibrant, emerald green broccoli florets and toasted white sesame seeds offers a visual and nutritional balance to the rich glaze.
The Foundation: Essential Ingredients for the Perfect Glaze
To achieve the results seen in our visual blueprint, we must select ingredients that behave correctly under heat. Substituting regular soy sauce is not an option here; we need the depth of tamari to ensure the recipe remains strictly gluten-free while providing a robust flavor base.
Boneless Skinless Chicken Thighs (1.5 lbs / 680g): Unlike breasts, thighs contain enough intramuscular fat to stay juicy during the high-heat searing process. Cut them into uniform 1-inch (2.5cm) bite-sized chunks to ensure even cooking and maximum surface area for the sauce.
Gluten-Free Tamari (1/2 cup / 120ml): This is the backbone of our Gluten Free Teriyaki Chicken. It provides a deeper, richer umami flavor than standard soy sauce and is naturally wheat-free.
Light Brown Sugar (1/2 cup / 100g): The molasses content in brown sugar is what helps achieve that deep mahogany color. It also aids in the caramelization process during the final toss in the pan.
Mirin (1/4 cup / 60ml): This Japanese rice wine adds a distinct fermented sweetness and helps create the “ultra-glossy” finish described in our visual prompt. If you cannot find GF-certified mirin, a splash of dry sherry with a pinch of sugar works in a pinch.
Fresh Garlic and Ginger (1 tbsp each / 15g): Finely grated aromatics dissolve into the sauce, providing flavor without interrupting the smooth, syrupy texture of the glaze.
Cornstarch Slurry (1 tbsp cornstarch + 1 tbsp water): This is the secret to the translucency. Unlike flour, cornstarch creates a clear, heavy-bodied sauce that reflects light beautifully.
Neutral Oil (2 tbsp / 30ml): Use an oil with a high smoke point, like avocado or grapeseed oil, to achieve those golden-brown seared edges without the oil breaking down or smoking.
The Professional Tool Kit
Achieving a restaurant-quality sear requires the right equipment. A heavy-bottomed cast iron skillet or a high-quality stainless steel pan is preferred over non-stick for this recipe. The goal is to build a “fond”—those little browned bits on the bottom of the pan—which will eventually deglaze into the sauce for extra depth.
You will also need a sharp chef’s knife to achieve the “paper-thin” sliced scallions mentioned in our visual recipe blueprint. A microplane is ideal for grating the ginger and garlic into a fine paste, ensuring they meld seamlessly into the mahogany glaze.
Mastering the Sear and the Glaze
Step 1: Preparing the Fluffy Jasmine Rice
Start by rinsing 1.5 cups (300g) of long-grain jasmine rice under cold water until the water runs clear. This removes excess surface starch, ensuring the grains remain individual and fluffy rather than sticky. Combine with 2.25 cups (540ml) of water and a pinch of salt; bring to a boil, then simmer covered for 15 minutes. Let it sit, undisturbed, for 5 minutes before fluffing with a fork.
Step 2: Searing the Chicken Chunks
Pat the chicken chunks dry with paper towels—moisture is the enemy of a good sear. Heat your oil in the skillet over medium-high heat until it shimmers. Add the chicken in a single layer, ensuring they aren’t crowded. Let them sit undisturbed for 3-4 minutes until a deep golden-brown crust forms on the bottom. Flip and sear the other side for another 2 minutes. The chicken should show those slightly crisped edges highlighted in our visual prompt.
Step 3: Building the Mahogany Sauce
While the chicken sears, whisk together the tamari, brown sugar, mirin, garlic, and ginger. Once the chicken is seared, pour the sauce mixture directly into the hot pan. Use a wooden spoon to scrape up any browned bits from the bottom. The liquid will begin to bubble vigorously and interact with the chicken’s natural fats.
Step 4: Achieving the Syrupy Gloss
Whisk your cornstarch and water together to create a smooth slurry. Pour this into the bubbling pan. Watch closely as the sauce transforms from a thin liquid into a thick, translucent, and ultra-glossy glaze within 60 seconds. The color will darken into a rich mahogany. Toss the chicken continuously to ensure every piece is coated in a heavy, syrupy layer.
Step 5: Steaming the Emerald Broccoli
While the sauce finishes, steam your broccoli florets for just 3-4 minutes. You are looking for a “vibrant green” or “emerald” color. They should be tender-crisp to provide a fresh structural contrast to the soft rice and syrupy chicken. If you enjoy this pairing, you might also like our teriyaki chicken with broccoli for a different preparation style.
Chef’s Secrets for Visual Perfection
- The Scallion Technique: To get those “paper-thin” slices, use only the green parts of the scallion and cut them at a sharp bias (diagonal). Soak them in ice water for 2 minutes to make them curl slightly for a high-end restaurant aesthetic.
- The Sesame Pop: Always use toasted white sesame seeds. If yours are raw, toss them in a dry pan for 30 seconds until they are fragrant and golden. This adds a crucial nutty layer to the Gluten Free Teriyaki Chicken.
- Don’t Overcrowd: If your pan is too small, sear the chicken in two batches. Overcrowding causes the meat to steam in its own juices, preventing the golden-brown seared edges we need for forensic accuracy.
- Controlled Reduction: If the sauce becomes too thick, add a tablespoon of water at a time. The goal is a sauce that “coats the back of a spoon” but remains translucent.
Preserving the Experience: Storage and Reheating
This dish is best served immediately while the rice is steaming and the glaze is at its glossiest. However, leftovers make for an incredible lunch. Store the chicken and rice in airtight containers for up to 3 days. The sauce will thicken further in the fridge.
When reheating, add a splash of water to the chicken to loosen the mahogany glaze. Microwave in 30-second intervals or reheat in a skillet over low heat. Avoid overheating the broccoli, as it will lose its vibrant emerald green color and become mushy.
Completing the Meal
While this bowl is a complete meal on its own, you can expand your gluten-free repertoire by exploring other flavor profiles. If you enjoy the sweet and savory balance, try our pineapple chicken teriyaki for a tropical twist. For those who prefer handheld options, these flavors work beautifully in a teriyaki chicken wrap.
If you find yourself craving more vegetable-forward dishes, our teriyaki chicken and green beans offers another crunchy, vibrant alternative that fits perfectly into a weekly meal prep routine.
Common Questions About Gluten-Free Teriyaki
Yes, but be careful not to overcook them. Thighs are more forgiving and stay juicy under the high heat required to get those crisped, golden-brown seared edges.
The secret is using a cornstarch slurry and a high sugar content (like brown sugar or mirin). When boiled, the starch gelatinizes, creating a clear, translucent, and light-reflecting syrup.
No, traditional teriyaki sauce is made with soy sauce, which contains wheat. To make it gluten-free, you must use tamari or coconut aminos and ensure your mirin and cornstarch are certified GF.
Long-grain jasmine rice is ideal because it remains fluffy and individual, providing a neutral, textured base that absorbs the heavy, syrupy mahogany glaze without becoming mushy.
This usually happens if the sauce wasn’t simmered long enough or if the cornstarch slurry wasn’t activated by high heat. Ensure the sauce reaches a vigorous bubble to thicken properly.
The Ultimate Gluten Free Teriyaki Chicken Recipe
Gluten Free Teriyaki Chicken with a Glossy Mahogany Glaze
Ingredients
Equipment
Method
- Rinse jasmine rice. Combine with 2.25 cups water and salt. Simmer covered for 15 minutes, then fluff.
- Steam broccoli florets for 3-4 minutes until vibrant emerald green. Set aside.
- Heat oil in a skillet. Pat chicken dry and sear chunks until deep golden-brown with crisped edges.
- Add tamari, sugar, mirin, garlic, and ginger. Stir to deglaze the pan.
- Pour in cornstarch slurry. Stir for 1 minute until the sauce is thick, mahogany-colored, and glossy.
- Place a mound of rice in a bowl. Top with glazed chicken and broccoli florets. Garnish with sesame seeds and scallions.
Notes
Ensure your cornstarch slurry is fully mixed before adding to prevent lumps.
Closing & Call to Action
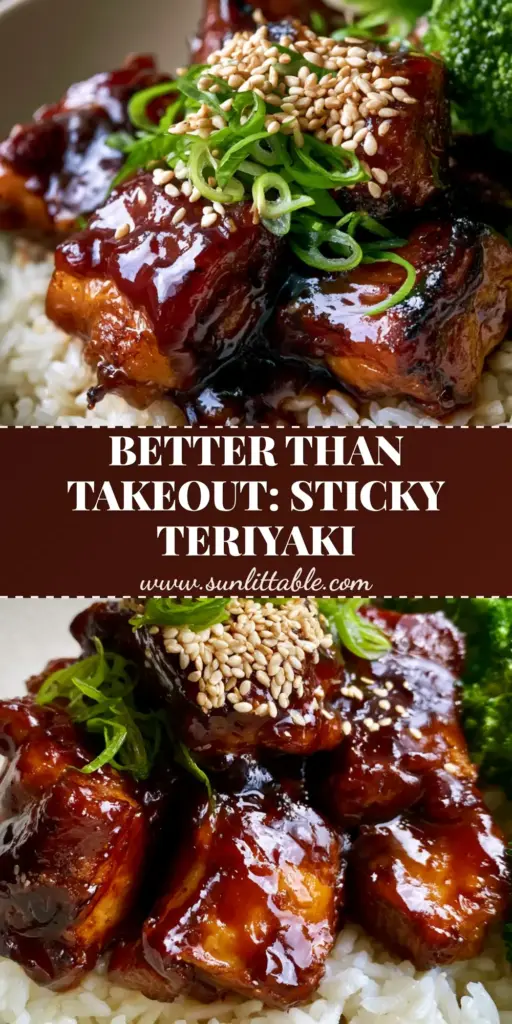
Creating a Gluten Free Teriyaki Chicken that looks as good as it tastes is all about attention to detail. From the syrupy reflections in the mahogany glaze to the fluffy grains of jasmine rice, this dish is a testament to the power of high-quality ingredients and proper technique. We hope this recipe brings a high-end restaurant aesthetic to your home kitchen.
If you enjoyed this recipe, please leave a comment below and let us know how your glaze turned out! Don’t forget to follow us and share your creations on Pinterest for more gluten-free inspiration. Happy cooking!